Installing a foldable house can look simple when its walls arrive folded on a truck. In practice, each stage requires careful planning, accurate measurements, and trained supervision. This guide explains how to install a foldable house step by step, from site preparation to final inspection. It focuses on practical decisions that affect safety, stability, comfort, and long-term performance.
Before delivery, confirm the manufacturer’s installation manual, foundation requirements, transport limits, and local building approvals. A qualified engineer should check the ground, drainage, wind exposure, and expected loads. The foundation must be level and strong enough to support the home evenly. Small errors here can become visible later through sticking doors, uneven floors, or water leakage.
During installation, keep the work area clear and inspect lifting equipment before use. Position the structure carefully, unfold each panel gradually, and secure all connections according to the approved drawings. Check bolts, seals, insulation joints, windows, and roof drainage. Do not improvise with missing hardware. That mistake may save minutes and create expensive repairs.
Utilities need equal attention. Licensed professionals should connect electricity, plumbing, gas, or heating systems where applicable. Test every service before occupancy. Walk through the house during daylight and after rainfall if possible. Look for movement, drafts, damp corners, and unusual sounds. Not everything will be perfect on the first attempt. A thoughtful review can reveal problems early. This step-by-step approach supports a safer installation and helps owners understand how the building was assembled. When uncertain, pause the work and ask the supplier or a qualified local professional for guidance.
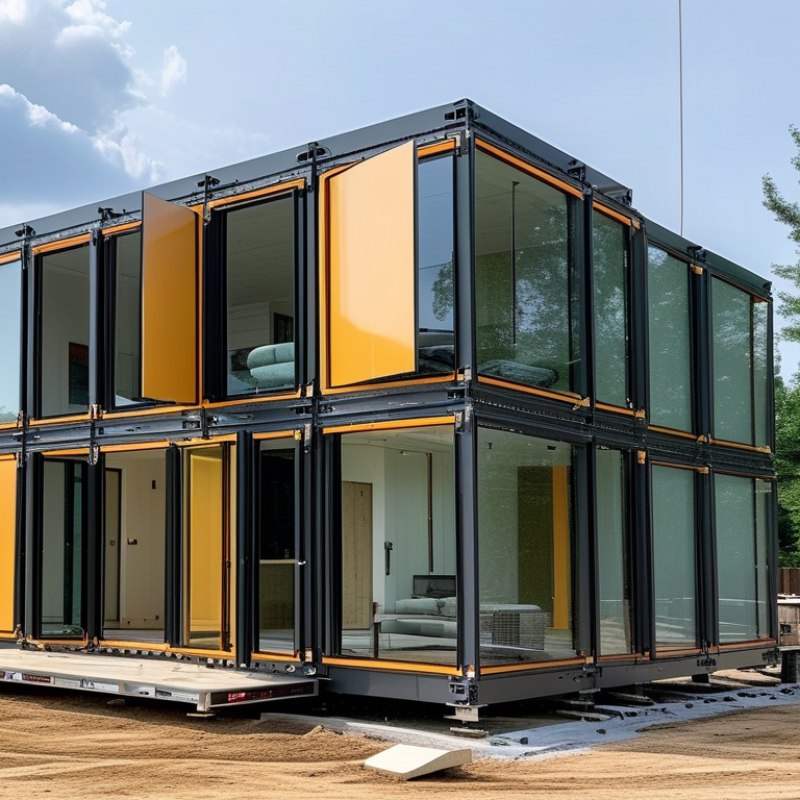
Before installing a foldable house, inspect the site carefully. Remove roots, loose soil, standing water, and construction debris. A simple soil test can reveal weak layers or poor drainage. Local building requirements may also specify frost depth, setbacks, and foundation design. Ask a qualified engineer to review these conditions before excavation.
The foundation must match the house dimensions and ground conditions. Common options include a reinforced concrete slab, concrete piers, or a perimeter footing. Mark every anchor point from the approved plan. Even a small measurement error can twist the frame during unfolding. Compact the subgrade in layers, then check it with a level. The surface should be firm, smooth, and slightly elevated above surrounding ground. Allow concrete to cure fully before placing the structure. Rushing this stage creates expensive repairs later.
In practice, the site rarely looks perfect on installation day. One corner may settle, or the soil may soften after rain. I would rather pause and correct the base than force the house into position. Recheck diagonal measurements after anchoring. Confirm that doors and windows open freely before interior finishing begins. Keep foundation records, concrete details, and inspection notes for future maintenance. A local professional should verify the final installation, especially in areas with heavy snow, high winds, or seismic movement.
Unpacking is not a formality. Record the package condition before removing straps or protective film. The Modular Building Institute’s 2023 Permanent Modular Construction Annual Report notes that modular methods may shorten schedules by 30–50%. That advantage disappears when damage is missed early. Keep the house on firm, drained ground. Check the delivery route, lifting points, and available working space before unfolding.
Inspect every hinge, locking pin, panel joint, window, seal, and floor connection. Look for bent steel, cracked coatings, loose bolts, or moisture inside the packaging. Use a spirit level across several floor points, not just one corner. A small error here can distort doors later. The International Code Council’s 2024 residential guidance emphasizes sound foundations, structural connections, and weather-resistant construction. Follow the supplied structural drawings and local inspection requirements.
Position the house with its main access facing a clear path. Leave room for roof drainage, maintenance, and emergency access. Confirm that no plumbing or electrical connection is trapped beneath the frame. The U.S. Environmental Protection Agency reported 600 million tons of construction and demolition debris in 2018, so avoid careless packaging disposal and separate reusable materials. In practice, installers sometimes rush positioning after a successful lift. That is a mistake. Recheck level, diagonals, anchors, and door operation after the structure settles. It may feel excessive. It is cheaper than correcting movement later.
Unfolding and Securing the Main Structural Frame
Place the folded house on a level, compacted surface before opening the frame. Measure both diagonals. A difference above 10 millimeters often signals poor alignment. Use certified lifting equipment and keep workers outside the opening path. The U.S. Bureau of Labor Statistics recorded 1,075 fatal injuries in construction and extraction occupations during 2023. That figure makes controlled movement more than a procedural detail. It is a basic risk decision.
Release transport locks gradually, then unfold each wall section according to the manufacturer’s sequence. Never force a hinge that resists. Check verticality with a laser level, not visual judgment alone. Install temporary braces before fixing permanent bolts. Tighten anchors in a cross pattern, using the specified torque value. OSHA requires fall protection for many construction activities at six feet above a lower level. Roof-edge work therefore needs guardrails, personal fall protection, or an approved alternative. I have seen frames appear square until the roof panels were added. That mistake wastes time. Sometimes, it also bends connections. Recheck the diagonals after every major panel is secured. Record bolt torque, anchor positions, and weather conditions in a site log. The International Building Code also emphasizes verified connections and load paths, but local requirements may differ. A careful installer should pause when drawings, hardware, and site conditions disagree. That pause is not inefficiency. It is judgment.
The chart presents a practical installation sequence for a typical small foldable housing unit. The times are field-planning estimates for a trained four-person crew and should be adjusted to the site conditions, foundation requirements, weather, and manufacturer instructions.
Installing utilities in a foldable house requires careful sequencing. Confirm the frame is fully opened, leveled, and mechanically secured before connecting services. Measure each connection twice. A small movement can stress pipes, cables, and drain joints.
The U.S. Energy Information Administration reported that space heating used 42% of residential energy in 2020, while water heating used 19%. Efficient insulation, sealed ductwork, and correctly sized water lines therefore matter. Route electrical cables through protected conduit, and leave a service loop near movable wall sections. A licensed electrician should verify grounding, breaker capacity, and moisture protection. Install supply pipes with shutoff valves. Test every joint under pressure before covering the walls. Drain lines need steady fall, but mine was slightly uneven during an early installation. That mistake reminded me to check levels continuously.
Interior fixtures should be installed after utility testing. Secure sinks, toilets, lighting, cabinets, and ventilation units to reinforced points, not thin panels. Use flexible, approved connectors only where movement is expected. Exterior connections need weatherproof sleeves, sealed penetrations, and protection from freezing conditions. The National Fire Protection Association emphasizes that electrical distribution equipment remains a major factor in residential fire incidents, so avoid overloaded outlets and hidden cable damage. Water connections should also include backflow protection where local requirements apply.
Tips: Label every cable and pipe before closing panels. Photograph concealed routes. Keep access panels near valves and junctions. Check the manufacturer’s installation limits, then confirm local building requirements. Do not rush this part.
Before occupation, inspect every foldable house connection under daylight and again after dusk. Check hinges, locking pins, floor joints, roof seams, and wall panels for movement. Use a calibrated level across the floor. A difference above the manufacturer’s tolerance needs correction, not concealment. I have seen minor misalignment become a sticking door after one week. That detail is easy to dismiss.
Test each electrical outlet with a socket tester, then verify grounding and protective-device operation. A licensed professional should inspect the distribution panel and cable routes.
NFPA’s Home Structure Fires report found cooking equipment involved in 53% of reported home fires from 2017 to 2021.
Keep the cooking zone clear, secure the gas or electrical supply, and confirm ventilation works. Do not occupy the building if smoke alarms, carbon-monoxide alarms, or emergency lighting are missing.
Air quality deserves a practical check. EPA guidance reports indoor pollutant levels can be two to five times higher than outdoor levels. Open vents, run exhaust fans, and remove packaging dust before bringing in furniture.
Check for damp insulation, trapped water, unusual odors, and condensation around windows. Measure indoor humidity with a simple meter; roughly 30% to 60% supports healthier conditions in many homes.
Walk every escape route with the lights off. Doors should open freely, stairs should feel stable, and the exterior path should remain clear. The final inspection may feel repetitive. That is precisely why rushed teams miss things.
: Photograph damaged packaging before removing straps or protective film. Check hinges, pins, joints, windows, seals, bolts, and floor connections. Look for bent steel, cracked coatings, or moisture.
Use firm, compacted, and well-drained ground. Leave space for roof drainage, maintenance, and emergency access. Keep the main entrance facing a clear path. Do not trap plumbing or electrical connections beneath the frame.
Measure several floor points with a spirit level. Check both diagonals before unfolding and after securing major panels. A small leveling error can distort doors later. One corner is not enough.
Use certified lifting equipment and controlled movement. Keep workers away from the opening path. Release transport locks gradually. Never force a resistant hinge. Pause when something feels wrong.
Install temporary braces before tightening permanent bolts. Use the specified torque and tighten anchors in a cross pattern. Check verticality with a laser level. Record bolt torque, anchor locations, and weather conditions.
Connect services only after the frame is opened, leveled, and secured. Measure every connection twice. Use protected conduit for electrical cables. Install shutoff valves on supply pipes. Test pipe joints before closing walls.
Attach sinks, toilets, cabinets, lights, and ventilation units to reinforced points. Do not rely on thin wall panels. Use flexible approved connectors where movement is expected. Keep access panels near valves and junctions.
Label every cable and pipe. Photograph concealed routes and connection points. Check drainage slope, grounding, breaker capacity, and moisture protection. Review local requirements and supplied drawings. I once missed a slight drain slope. That was avoidable.
This practical guide explains how to install a foldable house step by step, beginning with careful site preparation and foundation work. The ground should be level, stable, and properly drained, while the foundation must match the structure’s dimensions and load requirements. After delivery, unpack the components carefully, inspect them for damage or missing parts, and position the folded unit according to the planned layout and access requirements.
Next, unfold the main structural frame in the correct sequence and secure every connection, anchor, and support point. Once the structure is stable, qualified personnel can install electrical, plumbing, ventilation, and other utility systems, followed by interior fixtures and exterior connections. The final stage includes checking doors, windows, roofing, fasteners, seals, and utility connections. A complete safety inspection should confirm that the house is stable, weather-resistant, and suitable for occupancy before anyone moves in.

Estable Living